
what I'm starting with
Page 1 of 4 • 1, 2, 3, 4 ![]()

what I'm starting with
![]() by custom880 Tue Aug 15, 2017 3:31 pm
by custom880 Tue Aug 15, 2017 3:31 pm


does anyone have one of these sitting around for the drivers side, the hinge assy. for back door.

custom880- Posts : 161
Join date : 2017-01-04
Re: what I'm starting with
![]() by regal81455 Thu Aug 17, 2017 7:18 am
by regal81455 Thu Aug 17, 2017 7:18 am

regal81455- Admin
- Posts : 565
Join date : 2014-12-29
Age : 44
Location : BFE, IL
Re: what I'm starting with
![]() by custom880 Thu Aug 17, 2017 12:47 pm
by custom880 Thu Aug 17, 2017 12:47 pm

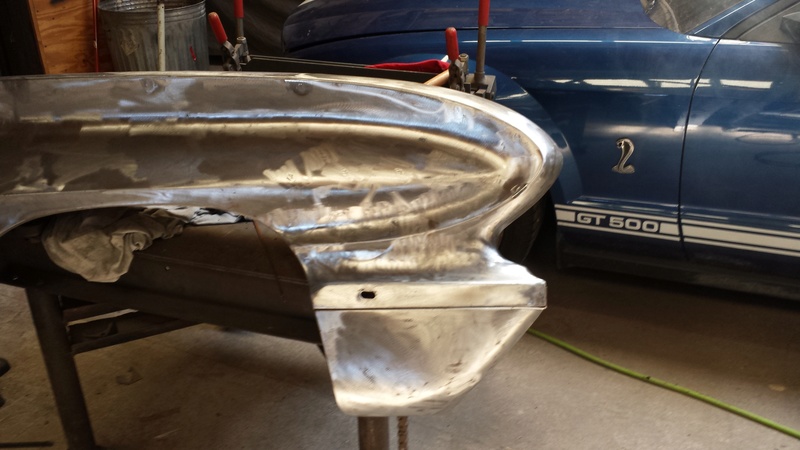
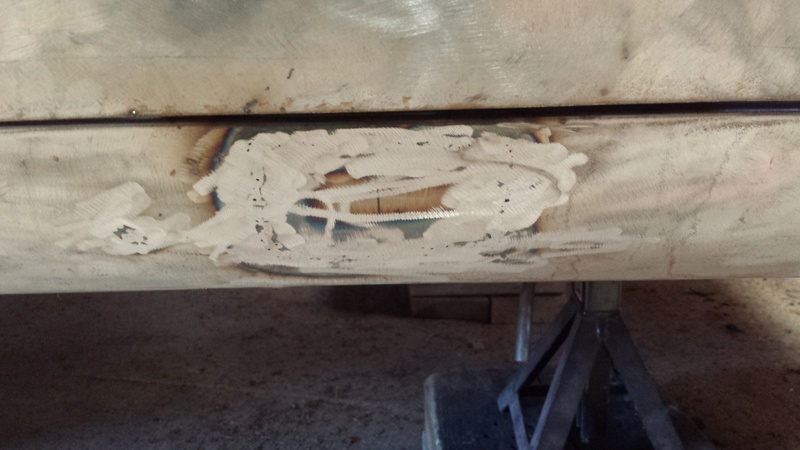
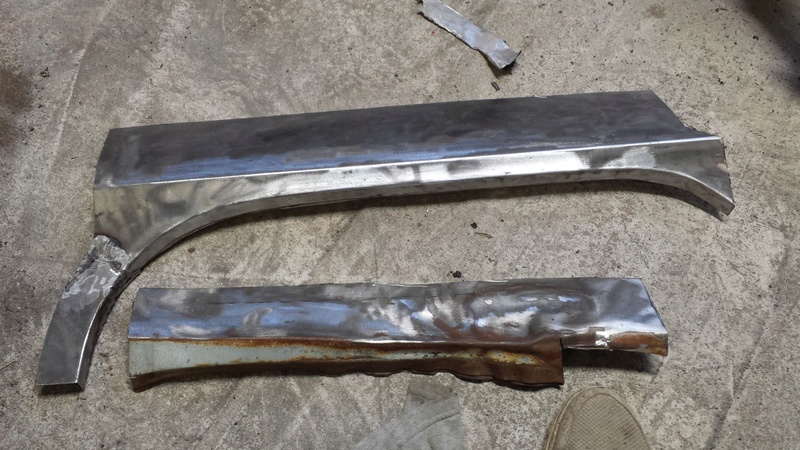
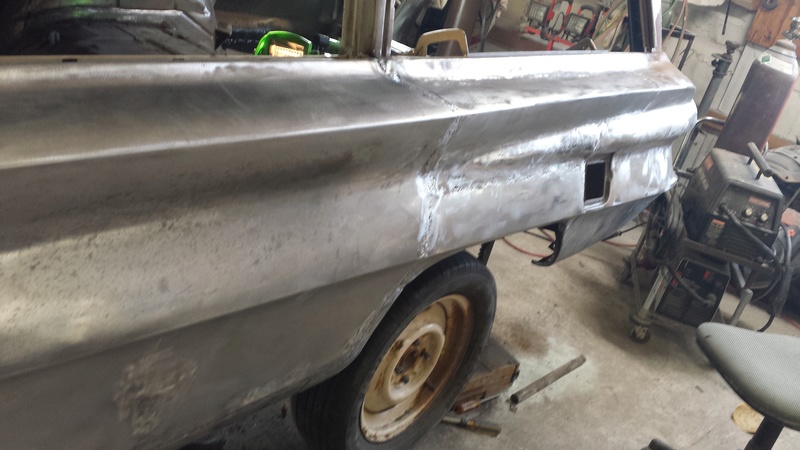
The bottom of the fender was rusted out, I made the bottom section with an anvil ball peen and vise. the rusty insert was cut from a trashed fender

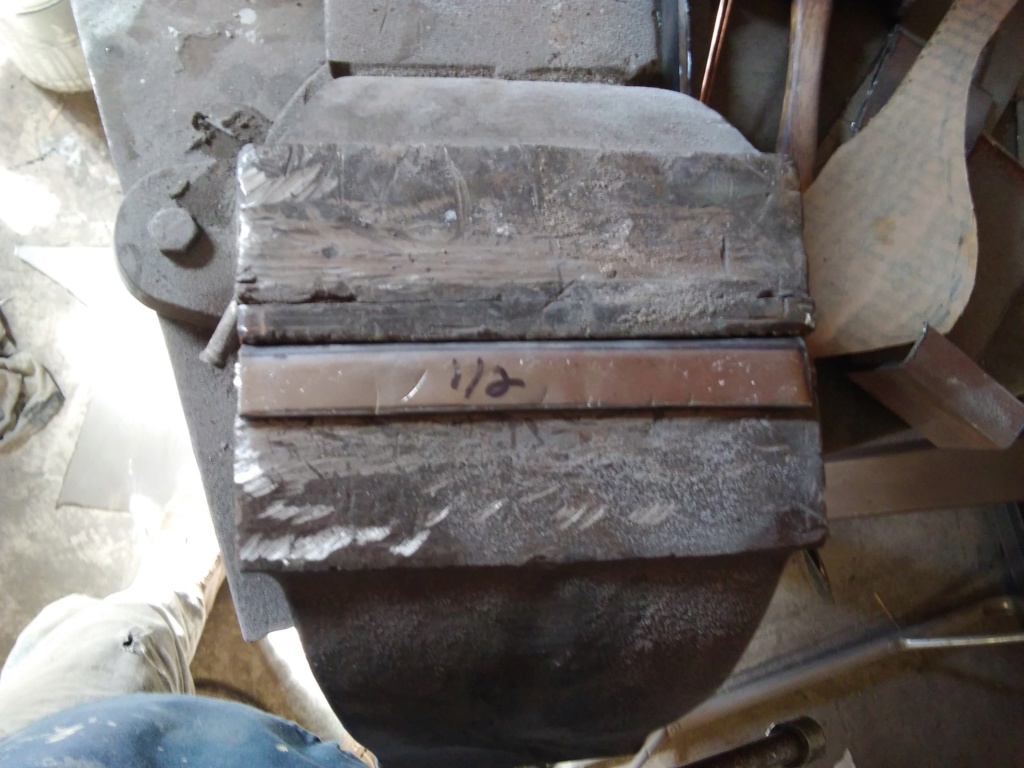
another shot of the piece I made

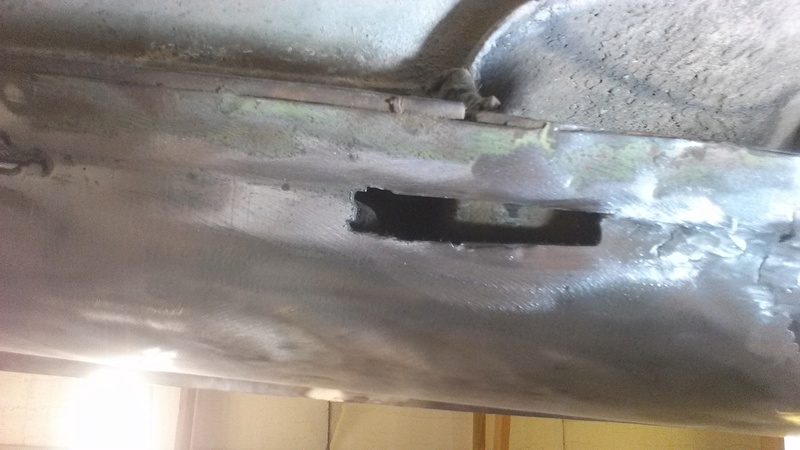
Insert tack welded in, using a tig which I'm new to (self taught)but having a few problems and I did get some warping which just happen to be under the brace, got some of it out by sliding flat bar under brace and hitting the brace.

any ideas on what causes this, I'm thinking dirt or rust in the metal but then I'm not a pro so any help?

gona need a little bondo only a lot less than before. Wanted to fill the moulding holes but we're having freaky weather 95+ with humidity thats unnatural for this part of Ok.
custom880- Posts : 161
Join date : 2017-01-04
Re: what I'm starting with
![]() by regal81455 Thu Aug 17, 2017 1:51 pm
by regal81455 Thu Aug 17, 2017 1:51 pm
Can you tell us what kind of tig welder you're using and the settings / rods, etc.. this might help us figure out what is causing your blow through although I've got almost no experience with TIG. Others might though.
regal81455- Admin
- Posts : 565
Join date : 2014-12-29
Age : 44
Location : BFE, IL
Re: what I'm starting with
![]() by custom880 Tue Aug 29, 2017 7:06 pm
by custom880 Tue Aug 29, 2017 7:06 pm


turned the heat down so I didn't get warpage or blow thru

finished product and a shameless plug for what I drive when I need to go fast
custom880- Posts : 161
Join date : 2017-01-04
Re: what I'm starting with
![]() by regal81455 Wed Aug 30, 2017 9:54 am
by regal81455 Wed Aug 30, 2017 9:54 am
regal81455- Admin
- Posts : 565
Join date : 2014-12-29
Age : 44
Location : BFE, IL
Re: what I'm starting with
![]() by custom880 Sat Sep 16, 2017 3:33 pm
by custom880 Sat Sep 16, 2017 3:33 pm

cutting that rear quarter out was a pain in the AS>>>>>>

engine out of parts car seems ok held antifreeze and turns broke one bolt in exhaust manifold luckily it was the other side than the bolt I broke in the engine in the wagon, yes did use heat just not enough I guess.

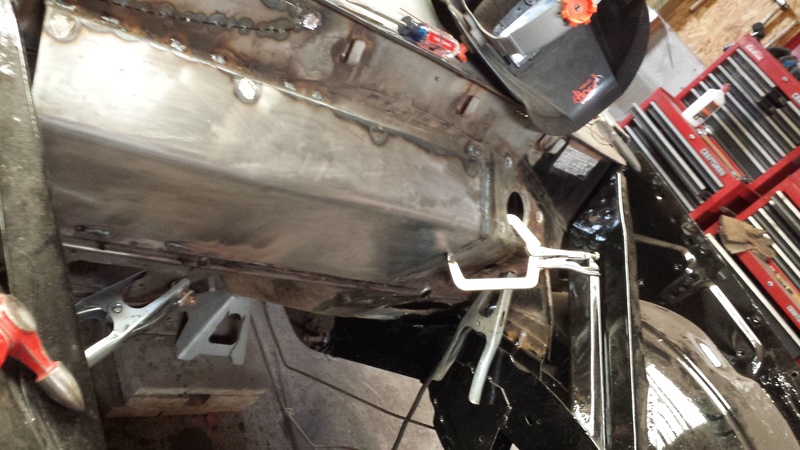
I also straightened out the driver quarter as much as possible with a portapower and a little luck. I'm going to cut out the worst damage and weld in the patch. The door seems match again so I'm happy.

had to cut out the inner fenderwell to have access to the sheet metal, thought I'd have to cut the outer wheelwell but it pushed and pulled back into shape while using the portapower.

next will be to cut and paste this into the mess.
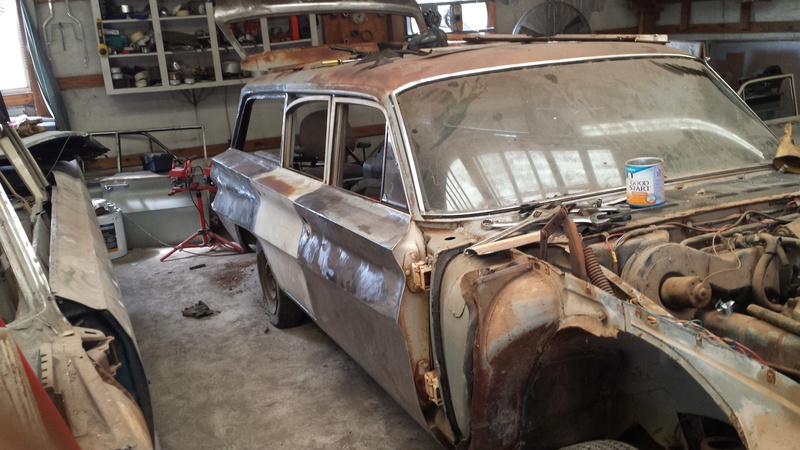
I hung the donor doors on the pass. side and cleaned them up a bit. Have some rust on the lower sill and already cut patches out of the donor just waiting to weld them in. My wife is thinking about having me paint it gold only after a few of these, we make it ourselves.....
I'm hoping to change her mind.......you guys have a great day!
custom880- Posts : 161
Join date : 2017-01-04
Re: what I'm starting with
![]() by regal81455 Mon Sep 18, 2017 9:48 am
by regal81455 Mon Sep 18, 2017 9:48 am
regal81455- Admin
- Posts : 565
Join date : 2014-12-29
Age : 44
Location : BFE, IL
Re: what I'm starting with
![]() by custom880 Mon Sep 18, 2017 4:22 pm
by custom880 Mon Sep 18, 2017 4:22 pm
My avatar was my first attempt at a ground up build. I found parts in fields around here and built a truck. I did everything from body to interior, only the machining was farmed out. I had a little over 7k in the truck when I lost it. I'm hoping on spending less on the wagon. I would rather take a car heading for the scrap yard and even if it takes some bondo, try to put it out on the road again.
Reason I'm posting this is someone stopped by and told me I was wasting my time while he nick-picked my work, at least I'm doing it myself I told him. My saving grace was when he looked at the trunk of my 880 and the way I put new metal in it. He said it wasn't original but didn't look bad. He then let it slip out that his 30k cuda's trunk had a repop trunk in it only they pop riveted it in while they restored his car.
I guess what I'm trying to say I'm 59 and still trying new things so for all of you that have doubts about doing your own work....don't it may not be perfect yet when it's on the road you'll have the satisfaction of knowing it's all yours and you'll have a chunk of change for your next ride.
On a side note rt338b-----wish I had your talent!
custom880- Posts : 161
Join date : 2017-01-04
Re: what I'm starting with
![]() by regal81455 Mon Sep 18, 2017 8:13 pm
by regal81455 Mon Sep 18, 2017 8:13 pm
regal81455- Admin
- Posts : 565
Join date : 2014-12-29
Age : 44
Location : BFE, IL
Re: what I'm starting with
![]() by custom880 Mon Sep 25, 2017 4:56 pm
by custom880 Mon Sep 25, 2017 4:56 pm

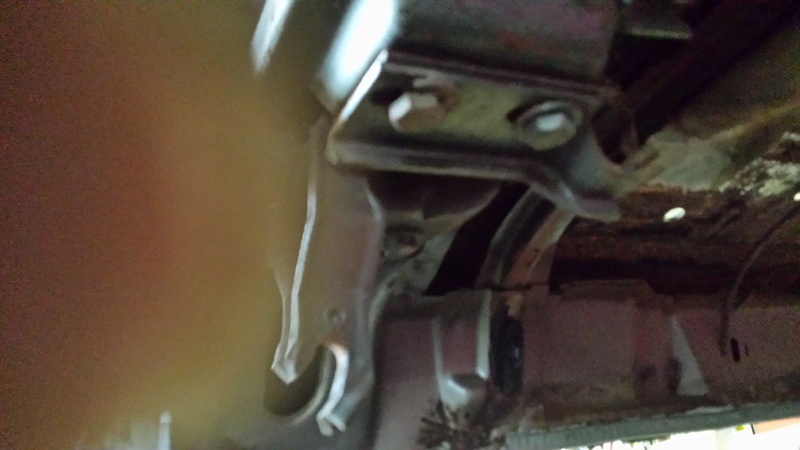
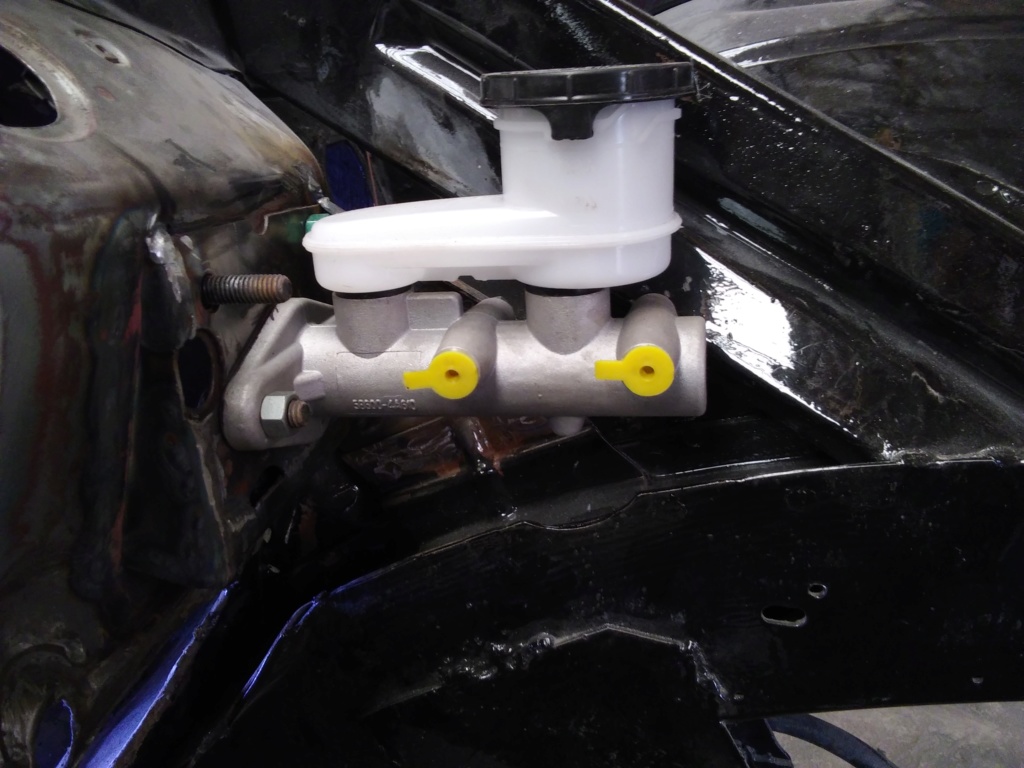
does anyone know if manual and power center link are the same? Cars shows a rebuild....is that using your old one or parts they have in stock.
I also did a little planning.

Where the black markers are I'm going to cut and bend the metal so the master cylinder will sit straight. The cuts will be bigger than the support and I'll fill with overlapping metal to keep the reinforcement. I'll cut the petal mount and bend it to match the new angle and weld the same.

I'm going to cut the firewall alone this line, just a little straighter, and bring it out, boxing the whole area to the bump near master cylinder so I can have more room for the vintage air system.

the controls are close to the same size as the vertical controls for the vintage system. Going to have to modify the dash to look sort of factory, did the same thing on my 46.
guess that's it for now!
custom880- Posts : 161
Join date : 2017-01-04
Re: what I'm starting with
![]() by regal81455 Mon Sep 25, 2017 7:15 pm
by regal81455 Mon Sep 25, 2017 7:15 pm
https://www.carpartsdiscount.com/catalog/buick~skylark~61.html?3594=2331
Beats trying to work with a questionable part and isn't nearly as tough to swallow!!
regal81455- Admin
- Posts : 565
Join date : 2014-12-29
Age : 44
Location : BFE, IL
Re: what I'm starting with
![]() by custom880 Fri Oct 13, 2017 5:26 pm
by custom880 Fri Oct 13, 2017 5:26 pm
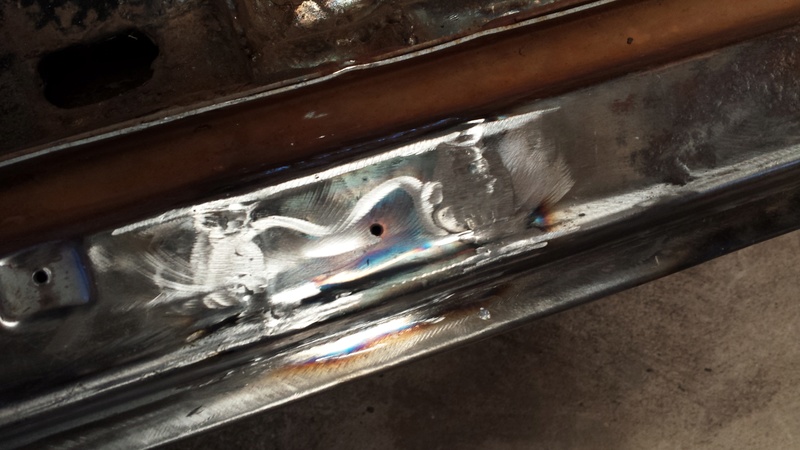
passenger rocker had these funny little holes

holes gone
same where the stainless mounts to for the carpet
before
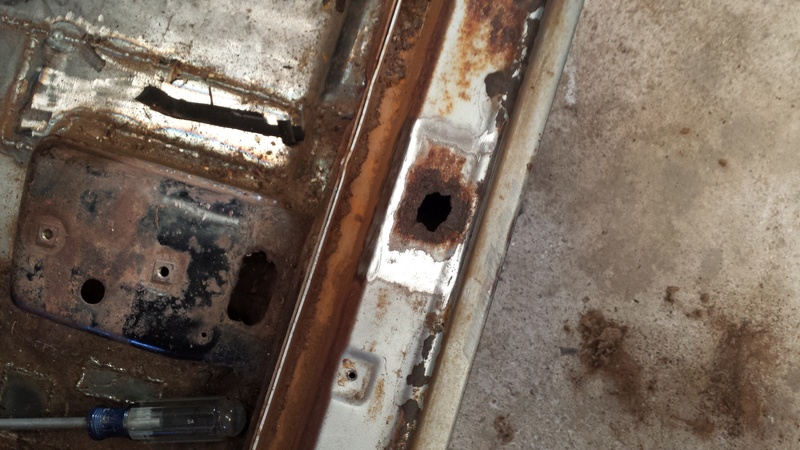
after
front inner fender had rust as well
before
after

a little seam sealer for good measure, don't worry I'll clean it up more before paint
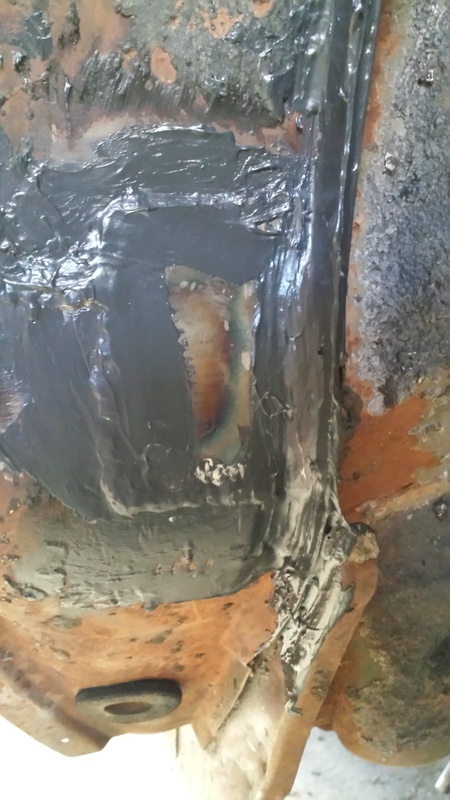
also took the front suspension out of parts car, anyone needing front drums I'll have 2 sets...going 5 lug disk brake
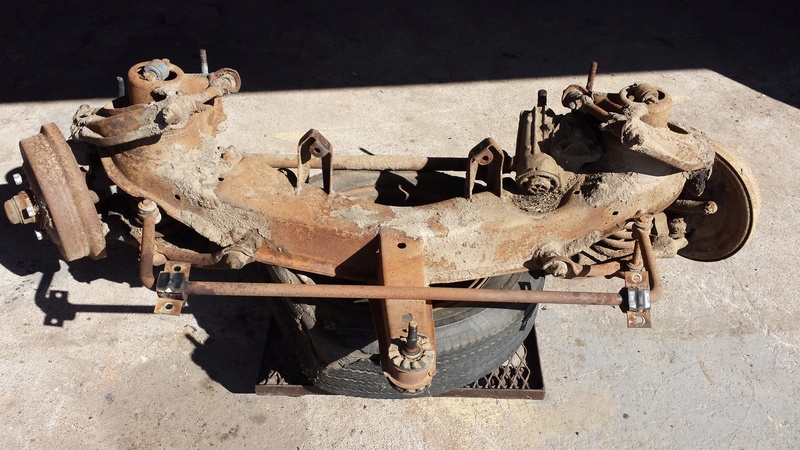
and my next tackle, already cut lower section out of parts car, its not as bad as it looks still needs a little metal added only a lot less than whats on the car


Some of you might think I'm nuts fixing a car so bad. I think that's the fun of it. I wouldn't be making it into a sedan delivery if it was in better shape. Leave the good cars for the restorers. (Ok I am nuts but having a blast)
custom880- Posts : 161
Join date : 2017-01-04
Re: what I'm starting with
![]() by 62cutlassconvert Fri Oct 13, 2017 6:33 pm
by 62cutlassconvert Fri Oct 13, 2017 6:33 pm
62cutlassconvert- Posts : 353
Join date : 2016-06-13
Location : Santa Cruz, CA
Re: what I'm starting with
![]() by custom880 Sat Nov 11, 2017 4:22 pm
by custom880 Sat Nov 11, 2017 4:22 pm
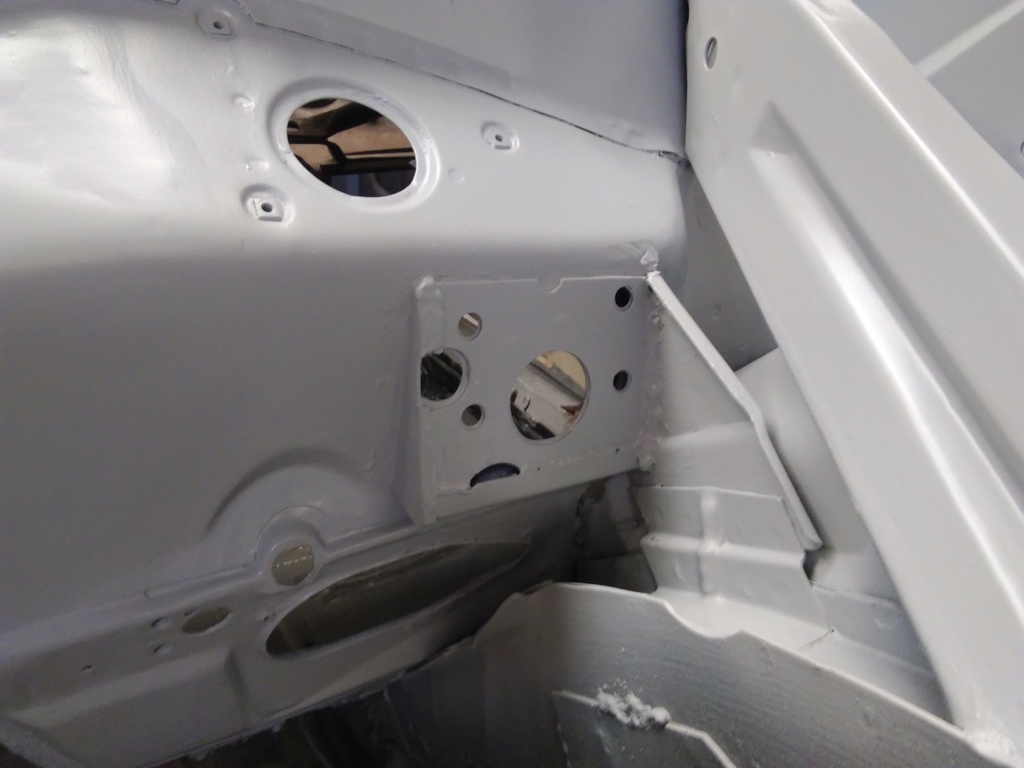
cleaned and por15 the engine bay, left the firewall clear since I have some modifying to do once I get the brake master cylinder.


fixed rear quarter


filled more holes and removed door handle on rear door

fixed some rust on the tail end of the wagon


made a forced air respirator

shop vac exhaust and it comes with a heepa filter.
last I primed the fenders a door and the body of my 880


I did the bodywork first on the 880 and have since found out that you can use the 2k epoxy primer first, to keep the metal from rusting under the bondo, then do the bodywork so I'm trying that out on the wagon. You'll see it here
custom880- Posts : 161
Join date : 2017-01-04
Re: what I'm starting with
![]() by custom880 Tue Nov 28, 2017 5:47 pm
by custom880 Tue Nov 28, 2017 5:47 pm
I'm shooting for having the pass. side done by the middle of December.
I also cut an old trunk I had to make the new firewall. It should give me about 4 more inches to tuck the ac in under the dash. Doesn't sound like much yet every inch helps for interior room.


I think it's an improvement, cleans up the firewall nicely.

custom880- Posts : 161
Join date : 2017-01-04
Re: what I'm starting with
![]() by custom880 Mon Dec 18, 2017 4:46 pm
by custom880 Mon Dec 18, 2017 4:46 pm


welded the rear door closed and welding the panels in the windows.

I primed the area and I'm now doing a little bodywork.
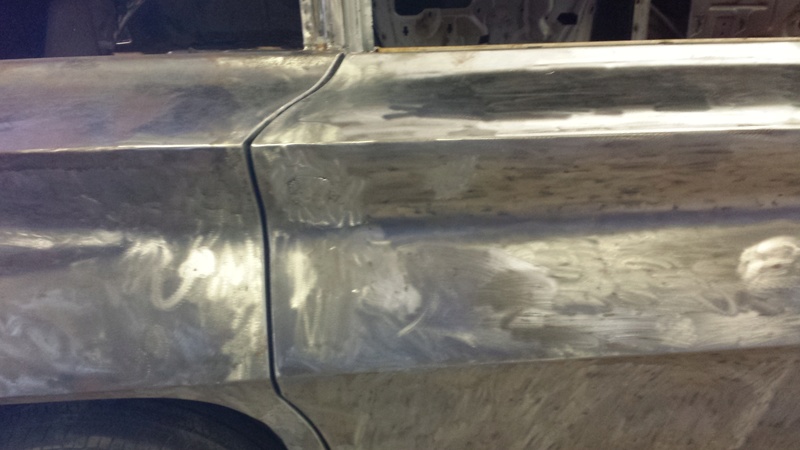
I didn't like the way the pillar looked so I've been spending a bit of time on it.
Before, drivers side....


pass side after I've worked it. I didn't want to have it look like a 4 door welded up so this is what I did.


it was a pain and most of the body work is done on the pillar just didn't have the camera today.
I wouldn't mind any ideas, hints or suggestions on how the build is going. Everyone needs a little motivation from time to time.
Other things I've done is blast the front suspension and will be painting it as soon as my brake brakes arrive. Ben has been trying to find some different rear brake drums to work on the rear....Haven't gotten any parts so I can't say anything on the install yet..
BTW Happy Holidays to everyone watching this build
custom880- Posts : 161
Join date : 2017-01-04
Re: what I'm starting with
![]() by Esasky's62Lark Tue Dec 19, 2017 12:12 pm
by Esasky's62Lark Tue Dec 19, 2017 12:12 pm
Chris

Esasky's62Lark- Posts : 154
Join date : 2015-07-14
Age : 46
Location : Jeannette, PA
Re: what I'm starting with
![]() by custom880 Mon Jan 08, 2018 5:47 pm
by custom880 Mon Jan 08, 2018 5:47 pm
started by cutting out the bottom of the drivers rear quarter since I noticed that the spears on the sedans are smaller than on the wagon. So I'm going to cut and section good for bad and hopefully I will be able to straighten the wagons spear enough to make it look good.

section from sedan next to whats left of the wagon that I cut out
and well now it's in place and tacked in.

Also did some more rust repair on the front area of rear quarter

and patched it up

filled in the area left open from wheel well install with a piece I made myself


finally the front, rear area on the quarter

for those still young enough a little advice...buy the tools you ever dream you might need before you get to the age that you say...well I'll make do. I wanted an english wheel and a few other metal shaping tools for years, I just can't see spending the money now even though I have and had needed them for years. done with my rant.. Ended up making this part with a hammer dolly vise and whatever else I could use. It's not perfect...It'll have to do

part welded in

found this while welding laying on a cold floor, next to be fixed,

I'm not going to finish welding the rear quarter till all the pieces are in place. I did however weld the inner fender well to the wheel well lip to try and keep integrity of the shape as much as possible since I have to cut and hack my way through the panel.
Hope everyone is enjoying the new year!!!!!!!
custom880- Posts : 161
Join date : 2017-01-04
Re: what I'm starting with
![]() by troy noble Fri Jan 26, 2018 1:26 pm
by troy noble Fri Jan 26, 2018 1:26 pm
troy noble- Posts : 66
Join date : 2018-01-26
Re: what I'm starting with
![]() by custom880 Sun Feb 04, 2018 5:00 pm
by custom880 Sun Feb 04, 2018 5:00 pm
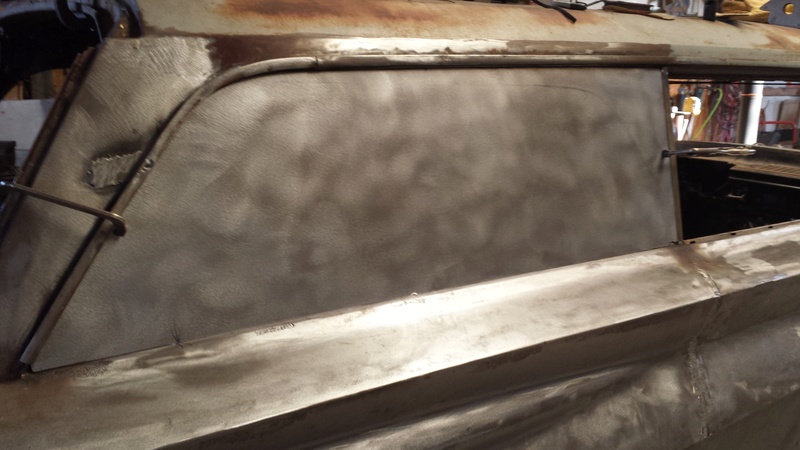
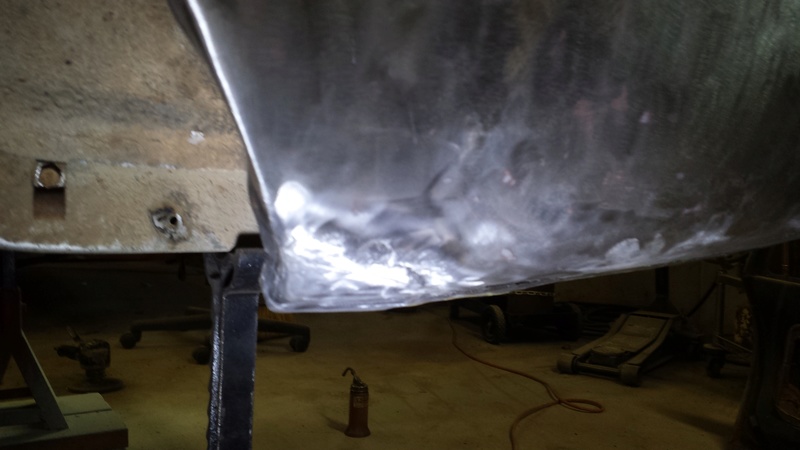
This is what it looked like

this is what it ended up looking like

Have some hammer/dolly work and some shrinking to do yet its solid once again.
few more shots


I tell you it was a job since I had to cut and paste several different pieces. Originally I was going to use the whole quarter out of the parts car then I realized that the "spears" where different sizes and the best I can figure is they had different dies for the wagons and the sedans.
I made it work anyways.
custom880- Posts : 161
Join date : 2017-01-04
Re: what I'm starting with
![]() by regal81455 Thu Feb 08, 2018 10:57 am
by regal81455 Thu Feb 08, 2018 10:57 am
regal81455- Admin
- Posts : 565
Join date : 2014-12-29
Age : 44
Location : BFE, IL
Re: what I'm starting with
![]() by custom880 Thu Mar 29, 2018 5:27 pm
by custom880 Thu Mar 29, 2018 5:27 pm
As for the wagon just been doing bodywork. have both sides done, well good enough until I start doing the finish sanding.


working on the roof now only three dents, two of which are already removed, last one on the rear by the hinges.

trying to get as much of the bodywork completed before summer sets in then it gets to hot here to do much bondo work. Still have the rear door to straighten out and strip the hood.I'll be starting to modify the interior next, retractable seatbelts, a/c etc. Hoping on spraying the front end and door jams etc. soon with single stage so I can get her up on her wheels again. Anyone run crager s/s wheels, any pics?
custom880- Posts : 161
Join date : 2017-01-04
Re: what I'm starting with
![]() by custom880 Thu Jun 07, 2018 7:12 pm
by custom880 Thu Jun 07, 2018 7:12 pm

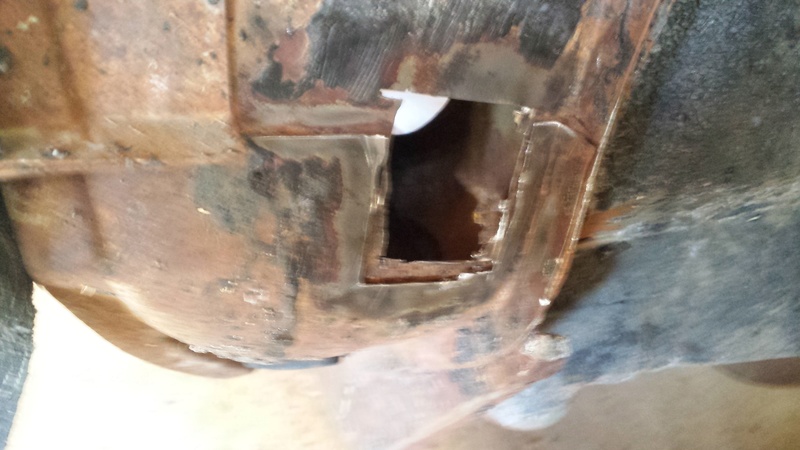
made a panel for the bottom that I bent and would over lap the original metal for added strength.
well maybe pics later having problems with downloading them. seem to all come out way oversized and blurry. Anyone else having problems with "host an image"
piece I made to fill the bottom of cut

inside shot with pilot holes since it was easier to cut in the inside.

top view everything clears.

installed after welding

had to cut and angle the pedal mount. seems to keep the same angle when completed.


job done.
custom880- Posts : 161
Join date : 2017-01-04
Page 1 of 4 • 1, 2, 3, 4 ![]()
|
|
|